 CategoriesDazzling Art Boutique BlogCategoriesDazzling Art Boutique Blog

 CategoriesDazzling Art Boutique Blog
Harnessing the Energy of the Wood Dragon
 CategoriesDazzling Art Boutique Blog
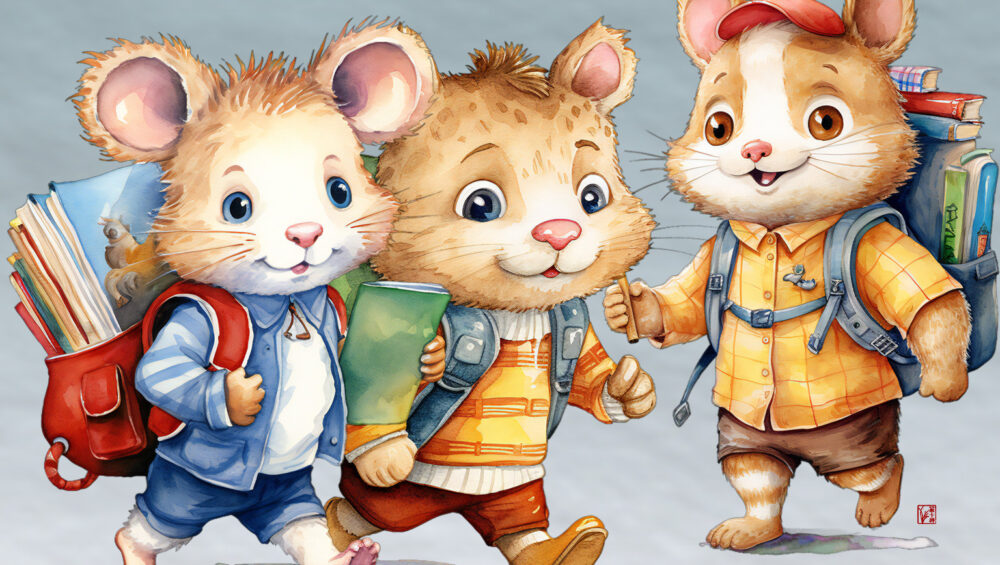
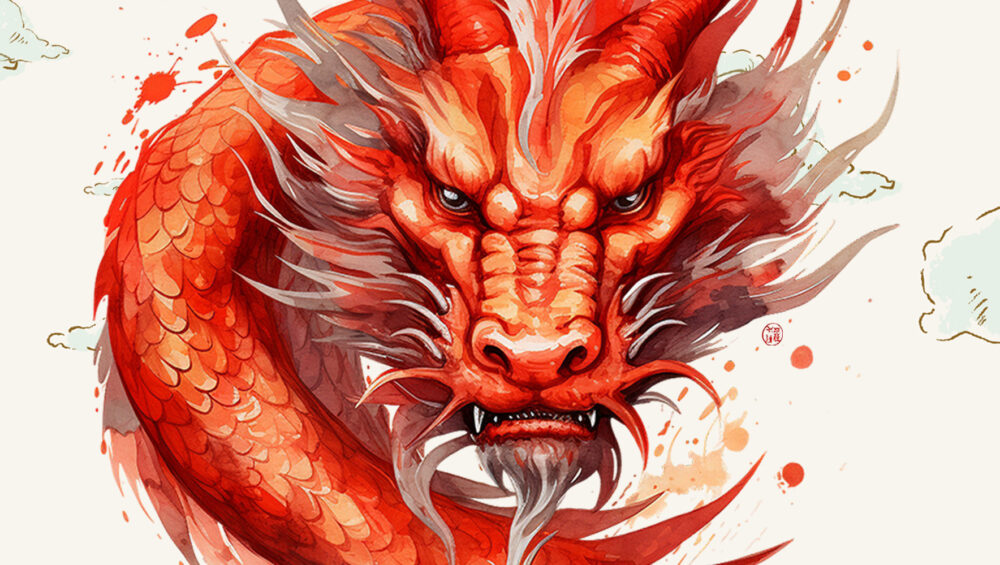
Embrace the Roar: Unleashing Creativity in the Year of the Dragon 2024!
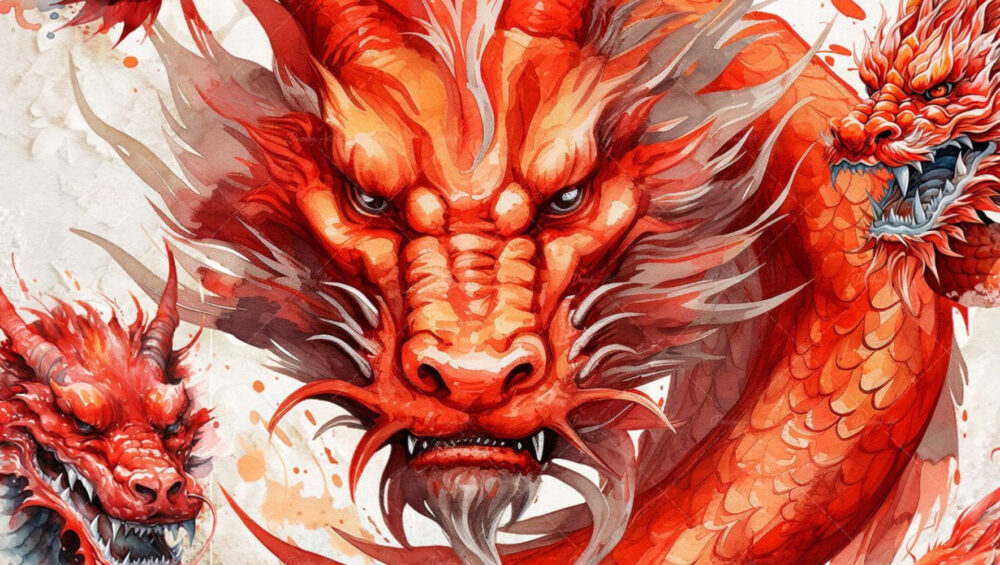
Dear fellow creatives, 2024 stands for an enchanting creative journey in the Year of the Dragon. In Chinese culture, the dragon is a symbol of power, wisdom, and good fortune. As I dive into my palette of watercolors, I can’t help but feel the electric energy that this mythical creature brings to the canvas of our lives.
The Year of the Dragon, occurring once every twelve years in the Chinese zodiac, is said to herald a period of transformation and auspicious beginnings. People born under the dragon’s reign are believed to be charismatic, innovative, and filled with the courage to pursue their dreams. It’s a time to embrace change, to let our creative spirits soar, and to unleash the inner dragon within each of us.
For artists and creatives, this year holds promises of inspiration and artistic breakthroughs. The dragon’s symbolism, with its majestic presence and mythical aura, invites us to explore new realms of creativity. It’s a year to boldly experiment with colors, textures, and themes, allowing our artistic expressions to reflect the dynamic and vibrant energy that the dragon embodies.
As we embark on this journey through the 2024 Year of the Dragon, let us channel its spirit into our creative pursuits. Whether you’re a seasoned artist or just beginning your creative adventure, the dragon’s influence encourages us to push boundaries, embrace the unknown, and infuse our creations with the magic of possibility.
Now, let’s paint the canvas of 2024 with the fiery hues of the dragon, welcoming a year filled with artistic exploration, growth, and the kind of creative magic that only comes around once in a dragon’s cycle. So, fellow creators, are you ready to ride the currents of inspiration and let your art take flight in the Year of the Dragon? Let the journey begin!
Painting the Year of the Dragon in Watercolors
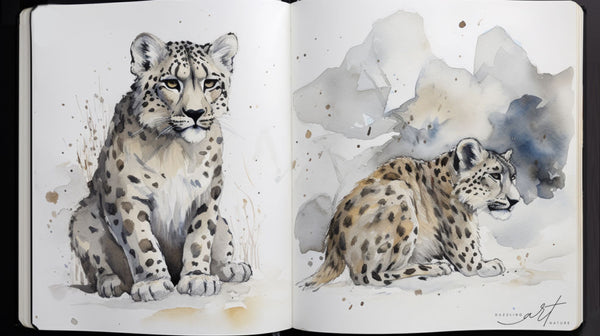
Watercolor enthusiasts, rejoice! The Year of the Dragon provides a canvas of endless possibilities. Imagine vibrant hues dancing together, capturing the essence of this powerful creature. As an artist who dabbles in watercolors, I find that this medium beautifully accentuates the fluidity and grace associated with dragons.
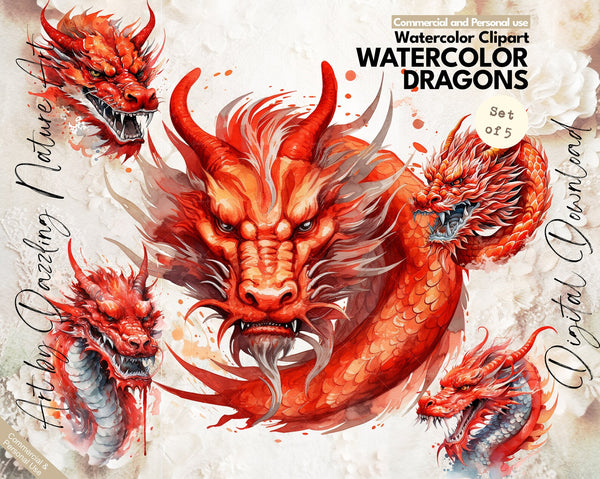
Elevate Your Creations with Watercolor Clipart Sets
For those who are on the lookout for artistic elements that seamlessly integrate with their projects, watercolor clipart sets are a game-changer. My personal collection aims to capture the fierce yet elegant nature of dragons, offering a plethora of elements that can be effortlessly incorporated into your designs. From intricate scales to swirling flames, these clipart sets are a treasure trove for artists seeking to infuse their creations with a touch of mythical energy. Visit the Collection here: 2024 Year of the Dragon Clipart Sets.
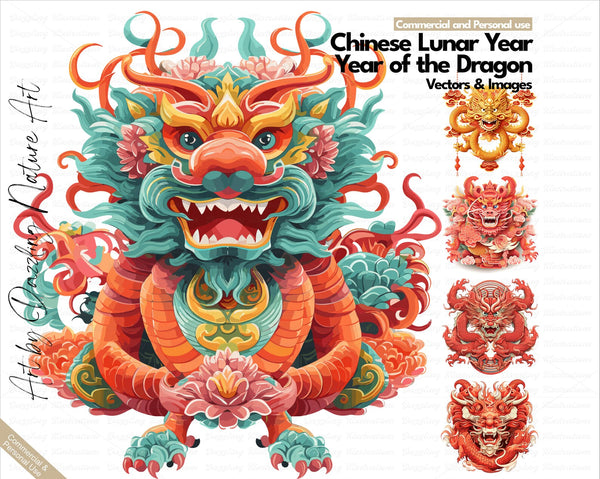
Vector Illustrations: Breathing Life into Designs
Vectors are the unsung heroes of digital art. As we dive into 2024, consider harnessing the power of vector illustrations to breathe life into your designs. Dragons, with their intricate details, come alive in the digital realm through vectors, allowing for scalability without compromising quality. Whether it’s banners, posters, or digital invitations, these illustrations adapt seamlessly to any canvas.
New Year’s Decor: From Canvas to Celebration
Let’s not forget the practical applications of our creations! The dragon-themed watercolor clipart sets and vector illustrations can be the stars of the show when it comes to New Year’s decorations. Imagine crafting personalized banners, greeting cards, or even party favors that reflect the energy of the Year of the Dragon. It’s not just art; it’s a celebration waiting to happen!
Conclusion
As we embark on the journey of 2024, let the dragon guide your artistic endeavors. Embrace the spirit of creativity with watercolors, elevate your designs with versatile clipart sets, and bring your visions to life through scalable vector illustrations. The Year of the Dragon is here, and it’s time for your art to roar!
So, fellow creators, are you ready to make 2024 the most creatively charged year yet? Let the dragon within you soar, and let your art leave an indelible mark on the canvas of time!

 CategoriesDazzling Art Boutique Blog
The Ultimate Guide to Watercolor Animal Paintings (pt. 2)
CREATING REALISTIC WATERCOLOR ANIMAL PAINTINGS
Creating realistic watercolor animal paintings requires a combination of technical skills, observation, and artistic interpretation. In this section, we will explore the key elements involved in achieving lifelike representations of animals in watercolor.
UNDERSTANDING ANIMAL ANATOMY
A fundamental aspect of creating realistic animal paintings is understanding animal anatomy. Having a solid grasp of the structure and proportions of the animal you are painting will help you accurately depict its form and movement.
Here are a few tips to enhance your understanding of animal anatomy:
- Study Reference Materials: Use books, photographs, and online resources to study the anatomy of the animal you wish to paint. Pay attention to the skeletal structure, muscle groups, and overall body shape. Understanding the underlying anatomy will enable you to portray the animal with accuracy and realism.
- Break It Down: Break down the animal’s body into basic shapes and forms. Start by sketching simple geometric shapes to establish the overall proportions and structure. Gradually refine your drawing by adding more details and defining the individual body parts.
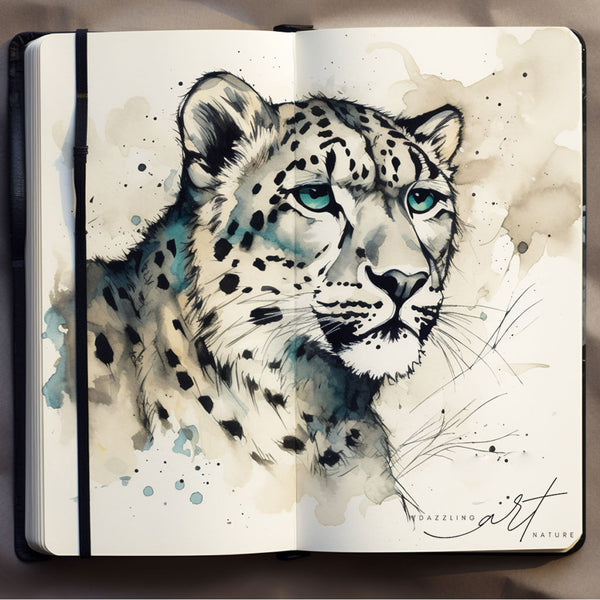
- Focus on Key Features: Animals have distinctive features that define their species. Pay close attention to the eyes, ears, nose, mouth, and any unique characteristics of the animal you are painting. These features play a significant role in capturing the essence and personality of the animal.
- Observe from Different Angles: Study the animal from various angles to understand how its body changes in different positions and movements. This will help you depict the animal realistically and add depth to your watercolor painting.
By developing a strong understanding of animal anatomy, you will be better equipped to capture the essence and likeness of the animals you paint.
COLOR THEORY AND MIXING PIGMENTS
Color plays a crucial role in watercolor animal paintings. Understanding color theory and how to mix pigments will allow you to accurately represent the colors and tones found in animal fur, feathers, or scales.
Here are some key concepts to consider:
- Primary Colors: The primary colors in watercolor are typically red, blue, and yellow. These colors cannot be created by mixing other colors and form the basis for all other colors.
- Secondary Colors: Secondary colors are created by mixing two primary colors. For example, mixing yellow and blue creates green, red and blue create purple, and red and yellow create orange.
- Tertiary Colors: Tertiary colors are created by mixing a primary color with a neighboring secondary color. These colors offer a wide range of hues and are useful for capturing the subtle variations in animal coat colors.
- Color Temperature: Understanding warm and cool colors is essential for creating depth and dimension in watercolor animal paintings. Warm colors, such as reds and yellows, tend to advance and evoke feelings of warmth. Cool colors, such as blues and greens, recede and create a sense of calmness.
- Color Mixing Techniques: Experiment with different color mixing techniques to achieve the desired colors and tones. Wet-on-wet blending, layering, and glazing techniques can be used to create harmonious transitions and subtle variations in color.
By mastering color theory and pigment mixing, you will have the tools to accurately represent the rich and varied colors found in animal subjects.
CAPTURING TEXTURES AND FUR IN WATERCOLOR
One of the challenges of watercolor animal paintings is capturing the intricate textures and details of fur, feathers, or scales. Here are some techniques to help you portray textures convincingly in your paintings:
- Observation: Observe the texture of the animal’s coat or skin closely. Pay attention to the direction, length, and patterns of the fur or feathers. This observation will guide your brushstrokes and help you achieve the desired texture.
- Dry Brushing: Dry brushing is a technique that involves applying a relatively dry brush on dry paper to create texture and fine details. Use this technique to depict the roughness, softness, or sheen of animal fur or feathers. Vary the pressure and direction of your brushstrokes to create realistic texture.
- Splattering and Spraying: Splattering or spraying watercolor paint onto the paper can simulate the texture of fur or feathers. Use a toothbrush or spray bottle to create small droplets or speckles on your painting. This technique can add depth and visual interest to your animal subjects.
- Lifting Techniques: Lifting techniques involve removing wet or dry paint from the paper to create highlights or texture. Use a clean brush, sponge, or paper towel to lift off paint and reveal the underlying white of the paper. This technique can be effective for creating highlights on fur or feathers.
- Negative Painting: Negative painting involves painting around the subject to create the illusion of texture. By painting the spaces between fur or feathers, you can create depth and texture. This technique requires careful planning and layering of colors.
Experiment with these techniques to capture the unique textures and details of the animals you are painting. Remember to observe closely and let your artistic intuition guide you.
CREATING DEPTH AND DIMENSION IN ANIMAL PAINTINGS
Creating depth and dimension is essential for giving your watercolor animal paintings a three-dimensional feel. Here are some techniques to achieve depth in your artwork:
- Value Contrast: Value refers to the lightness or darkness of a color. By emphasizing contrast between light and dark areas, you can create a sense of depth and volume in your animal subjects. Pay attention to the light source and how it affects the shadows and highlights on the animal’s body.
- Layering and Glazing: Layering and glazing techniques allow you to build up transparent washes of color to create depth and dimension. Start with lighter values and gradually add darker tones to create the illusion of depth and form. Glazing with transparent colors can add richness and depth to specific areas of your painting.
- Foreground, Middle Ground, and Background: Consider the placement and size of your animal subject within the composition. By creating a sense of depth through the use of foreground elements, middle ground details, and background elements, you can give your painting a realistic sense of space.
- Atmospheric Perspective: Incorporate atmospheric perspective by using lighter and less saturated colors in the background of your painting. This technique mimics the natural effect of distant objects appearing lighter and less detailed, enhancing the sense of depth in your artwork.
By employing these techniques, you can bring your watercolor animal paintings to life, adding depth, dimension, and a sense of realism.
In the next section, we will explore advanced techniques such as the wet-on-wet technique, glazing, masking fluid, and dry brushing, to further enhance your watercolor animal paintings.
ADVANCED TECHNIQUES FOR WATERCOLOR ANIMAL PAINTINGS
Once you have a solid foundation in the basic techniques of watercolor animal paintings, you can further enhance your skills by exploring advanced techniques. In this section, we will delve into some techniques that can elevate your watercolor animal paintings to the next level.
WET-ON-WET TECHNIQUE
The wet-on-wet technique is a versatile and spontaneous method that can create beautiful and soft effects in your watercolor animal paintings. This technique involves applying wet paint onto a wet surface, allowing the colors to blend and create organic shapes and textures.
To use the wet-on-wet technique, start by wetting your watercolor paper with clean water using a large brush. Make sure the paper is evenly saturated but not overly soaked. Then, while the paper is still wet, apply diluted paint to create the desired effect. The wet surface allows the pigments to spread and blend naturally.
Experiment with different color combinations and observe how they interact on the wet surface. You can create soft transitions, subtle gradients, and fluid textures that beautifully depict the fur, feathers, or scales of your animal subject.
GLAZING AND LAYERING
Glazing and layering are techniques that involve building up multiple layers of transparent washes to achieve depth, volume, and richness in your watercolor animal paintings. These techniques are particularly effective for capturing the subtle variations and complexities of animal fur, feathers, or scales.
To use the glazing technique, start by applying a wash of a light, transparent color to the entire area you want to paint. Let it dry completely. Then, apply subsequent layers of progressively darker or more saturated colors, allowing each layer to dry before adding the next. This layering process creates depth and dimension in your painting.
Layering, on the other hand, involves applying multiple layers of wet paint without waiting for the previous layer to dry. This technique allows for more spontaneous and blended effects, particularly useful for capturing the softness and texture of animal fur.
Experiment with different combinations of colors and layering techniques to achieve the desired effects in your watercolor animal paintings. Building up layers gradually will create richness and complexity in your artwork.
MASKING FLUID AND RESISTS
Masking fluid and resists are useful tools for preserving specific areas of your watercolor animal paintings or creating intricate patterns and textures. These techniques involve applying a masking fluid or resist material to the paper before painting, which acts as a barrier to protect the underlying areas from being painted over.
Masking fluid is a liquid latex compound that can be applied with a brush or a ruling pen. It dries into a rubbery consistency, creating a protective layer on the paper. Use masking fluid to preserve highlights, whiskers, or other fine details in your animal subject.
Resists, on the other hand, are substances that repel water or paint. Common resist materials include wax, oil pastels, or even common household items like salt or plastic wrap. Apply these materials to the paper before painting, and they will create interesting textures or patterns as the paint interacts with them.
When using masking fluid or resists, make sure to apply them on completely dry paper. Once your painting is complete and the paint has dried, gently remove the masking fluid or resists to reveal the preserved areas or unique textures.
ADDING DETAILS WITH DRY BRUSHING
Dry brushing is a technique that involves using a relatively dry brush with minimal water and paint to create texture, fine details, and sharp edges in your watercolor animal paintings. This technique is particularly effective for adding fur details, whiskers, or other intricate features to your animal subjects.
To use the dry brushing technique, dip your brush lightly into the paint and remove excess moisture by dabbing it on a paper towel. Apply the brush with gentle pressure, allowing the texture of the paper to show through. This technique creates a scratchy, textured effect that adds depth and realism to your animal paintings.
Dry brushing can also be used to create sharp edges and define the contours of your animal subject. Use a small, pointed brush to carefully apply paint along the edges, emphasizing the shape and form of the animal.
Experiment with different brushes, pressures, and techniques to achieve the desired level of detail and texture in your watercolor animal paintings. Dry brushing is a versatile technique that allows you to add fine details and enhance the overall realism of your artwork.
In the next section, we will provide valuable tips and tricks to help you further refine your watercolor animal paintings, including creating strong compositions, mastering shadows and highlights, understanding the importance of values, fixing mistakes, and exploring different styles and approaches.
TIPS AND TRICKS FOR WATERCOLOR ANIMAL PAINTINGS
Mastering the art of watercolor animal paintings requires not only technical skills but also a keen eye for observation and creativity. In this section, we will explore valuable tips and tricks that will help you refine your techniques, enhance your compositions, and bring your watercolor animal paintings to life.
CREATING A STRONG COMPOSITION
A strong composition is essential for capturing the viewer’s attention and conveying the message or story of your watercolor animal painting. Here are some tips to create a compelling composition:
- Rule of Thirds: Divide your painting into a grid of nine equal parts by mentally drawing two horizontal and two vertical lines. Place the focal point or the most important elements of your painting along these lines or at their intersections. This technique creates balance and visual interest.
- Leading Lines: Use lines, such as the animal’s body, branches, or other elements, to guide the viewer’s eye through the painting. Leading lines can add movement and direct attention to the main subject of your artwork.
- Negative Space: Utilize negative space, the area around the subject, to create a sense of balance and emphasize the main focal point. Leaving areas of the painting less detailed or using a simple background can enhance the focus on the animal.
- Cropping and Framing: Experiment with different cropping and framing techniques to create a dynamic composition. Zoom in on certain parts of the animal or frame it within a natural environment to add depth and interest.
Remember to plan your composition before you start painting. Sketch out thumbnail sketches to explore different compositions and determine the most effective arrangement for your subject.
MASTERING THE ART OF SHADOWS AND HIGHLIGHTS
Shadows and highlights play a vital role in adding depth, volume, and realism to your watercolor animal paintings. Here are some tips to master the art of shadows and highlights:
- Observe Light Sources: Pay close attention to the direction and intensity of light in your reference photo. Determine where the light is coming from and how it creates shadows and highlights on your subject. Understanding light sources will help you accurately depict the three-dimensional form of the animal.
- Value Contrast: Create contrast between light and dark areas to emphasize the volume and form of the animal. Darken the shadows by using deeper, more saturated colors. Gradually lighten the areas hit by direct light, using lighter and more translucent washes.
- Gradation and Blending: Use gradation and blending techniques to smoothly transition from shadows to highlights. Gradually change the intensity and value of the paint as you move from dark to light areas. Soften the edges between shadows and highlights to create a more realistic effect.
- Reflected Light: Consider the presence of reflected light, which occurs when light bounces off surfaces and illuminates the shadow areas. This phenomenon can affect the color and value of the shadows. Incorporate subtle hints of reflected light to enhance the realism of your animal paintings.
By mastering the interplay of shadows and highlights, you can bring depth, dimension, and a sense of realism to your watercolor animal paintings.
UNDERSTANDING THE IMPORTANCE OF VALUES
Values refer to the lightness or darkness of colors. Understanding the importance of values is crucial for creating realistic watercolor animal paintings. Here are some tips to help you analyze and work with values effectively:
- Squinting Technique: Squint your eyes or view your reference photo from a distance to simplify the values. This technique allows you to see the overall light and dark areas more clearly. It helps you identify the key areas of contrast and establish a strong value structure in your painting.
- Limited Value Range: Consider using a limited value range in your painting to create a more impactful and cohesive artwork. By focusing on a narrow range of values, you can achieve a sense of harmony and unity in your watercolor animal paintings.
- Value Studies: Before starting your final painting, create small value studies to experiment with different tonal arrangements. This practice allows you to plan the distribution of values and ensure a strong composition.
- Gradation and Contrast: Utilize gradation and contrast to create depth and interest in your artwork. Gradually transition between light and dark values to create a sense of volume and form. Contrast between areas of light and dark adds visual impact and focal points.
Keep in mind that values are relative and depend on the surrounding colors and lighting conditions. By understanding and effectively controlling values, you can create depth, dimension, and realism in your watercolor animal paintings.
FIXING MISTAKES IN WATERCOLOR ANIMAL PAINTINGS
Mistakes are a natural part of the artistic process, but they don’t have to ruin your watercolor animal paintings. Here are some tips for fixing common mistakes:
- Blotting and Lifting: If you make a mistake or want to lighten an area, blot the wet paint with a clean, damp brush or a paper towel. You can also lift dry paint with a damp brush or sponge. Be gentle to avoid damaging the paper.
- Layering and Glazing: Use layering and glazing techniques to cover up mistakes or adjust values. Apply additional layers of paint to correct colors or create smoother transitions. Allow each layer to dry before adding the next.
- Masking Fluid: If you need to preserve specific areas or correct mistakes, masking fluid can be a valuable tool. Apply masking fluid to protect the desired areas, let it dry, and then paint over the protected sections. Once the painting is complete, gently remove the masking fluid.
- Artistic Adaptation: Embrace the opportunity to adapt and improvise. Sometimes, mistakes can lead to unexpected and interesting results. Use your creativity to turn mistakes into happy accidents and incorporate them into your artwork.
Remember that mistakes are a valuable learning experience. Don’t be discouraged by them, but rather embrace them as opportunities for growth and experimentation in your watercolor animal paintings.
EXPLORING DIFFERENT STYLES AND APPROACHES
Watercolor animal paintings offer endless possibilities for artistic expression. Don’t be afraid to experiment with different styles and approaches to find your unique voice as an artist. Here are some ways to explore different styles:
- Realistic Approach: Embrace a realistic approach by focusing on capturing the intricate details and textures of animals. Pay close attention to anatomy, colors, and proportions to create highly detailed and lifelike paintings.
- Impressionistic Style: Experiment with loose brushwork, bold colors, and expressive marks to create an impressionistic style. This approach emphasizes the mood, atmosphere, and overall essence of the animal rather than precise details.
- Abstract Interpretation: Explore abstract interpretations of animals by simplifying forms, using unconventional colors, or emphasizing patterns and textures. This approach allows for more experimentation and encourages personal expression.
- Mixed Media: Combine watercolor with other mediums, such as ink, pastels, or colored pencils, to add different textures and effects to your animal paintings. This approach can add depth and interest to your artwork.
Remember that finding your style is a journey of self-discovery. Allow yourself to explore, experiment, and embrace your unique artistic voice as you create watercolor animal paintings.
Incorporating these tips and tricks into your watercolor animal paintings will help you refine your techniques, enhance your compositions, and bring a sense of realism and creativity to your artwork. With practice and dedication, you will continue to grow as an artist and create captivating watercolor animal paintings.
 CategoriesDazzling Art Boutique Blog
The Ultimate Guide to Watercolor Animal Paintings (pt. 1)
INTRODUCTION TO WATERCOLOR ANIMAL PAINTINGS
In the world of art, watercolor animal paintings hold a special place. These beautiful creations capture the essence and beauty of animals in a unique and captivating way. Whether you are an experienced artist or a beginner looking to explore the world of watercolor painting, this guide will provide you with a comprehensive understanding of watercolor animal paintings.
WHAT IS WATERCOLOR ANIMAL PAINTING?
Watercolor animal painting is a technique that utilizes water-based pigments to create stunning and realistic representations of animals. The transparent nature of watercolors allows artists to achieve delicate washes, vibrant colors, and subtle gradations, making it a perfect medium for capturing the intricate details of animals.
Watercolor animal paintings can range from highly detailed and realistic portrayals to more abstract and impressionistic interpretations. Artists have the freedom to experiment with different styles and techniques to bring their subjects to life on paper.

HISTORY OF WATERCOLOR ANIMAL PAINTINGS
The history of watercolor animal paintings can be traced back to ancient times. However, it wasn’t until the 18th century that watercolor gained recognition as a respected medium for animal art. During this period, artists like George Stubbs and Rosa Bonheur popularized the genre with their remarkable animal paintings.
In the 19th century, the popularity of watercolor animal paintings continued to grow, with artists such as Sir Edwin Landseer and Wilhelm Kuhnert becoming renowned for their realistic portrayals of animals in their natural habitats. Today, watercolor animal paintings have evolved to encompass a wide range of styles and techniques, making them a beloved genre among artists and art enthusiasts alike.
WHY CHOOSE WATERCOLOR FOR ANIMAL PAINTINGS?
Watercolor offers unique advantages that make it an ideal medium for animal paintings. Here are a few reasons why artists choose watercolor for capturing the beauty of animals:
- Transparency and Layering: Watercolor pigments are transparent, allowing artists to build up layers of color to achieve depth and luminosity. This characteristic is particularly useful when capturing the varied tones and textures of animal fur or feathers.
- Expressive and Versatile: Watercolors can be applied in various ways, allowing artists to create a wide range of effects, from soft and delicate washes to bold and vibrant strokes. This versatility lends itself well to capturing the diverse characteristics of animals.
- Fast Drying Time: Watercolors dry relatively quickly compared to other painting mediums, enabling artists to work efficiently and make adjustments as needed. This quality is especially beneficial when painting animals, as it allows for the depiction of movement and spontaneous brushwork.
- Portability: Watercolor paints are available in compact, travel-friendly sets, making them an excellent choice for artists who enjoy painting en plein air or on the go. This portability enables artists to observe and capture animals in their natural habitats.
- Subtle Color Mixing: Watercolor pigments can be easily mixed on the paper, allowing for the creation of subtle color variations and smooth transitions. This quality is particularly advantageous when replicating the complex colors and patterns found in animal fur, feathers, or scales.
By choosing watercolor as your medium for animal paintings, you open up a world of possibilities to express your creativity and bring animals to life on paper. In the following sections, we will delve deeper into the techniques, supplies, and tips to help you get started with watercolor animal paintings.
GETTING STARTED WITH WATERCOLOR ANIMAL PAINTINGS
Embarking on a watercolor animal painting journey is an exciting endeavor. In this section, we will guide you through the essential steps and considerations to help you get started in this captivating art form.
ESSENTIAL SUPPLIES FOR WATERCOLOR ANIMAL PAINTINGS
Before diving into your first watercolor animal painting, it’s important to gather the necessary supplies. Here is a list of essential materials you will need:
| Supplies | Description |
|---|---|
| Watercolor paints | Invest in a high-quality set of watercolor paints that offer a wide range of colors. Look for paints that have good lightfastness and are labeled as transparent. |
| Watercolor paper | Choose a heavy-weight, acid-free watercolor paper that is specifically designed for watercolor painting. The weight of the paper is measured in pounds (lbs) or grams per square meter (gsm). Opt for a weight of at least 140 lbs (300 gsm) to prevent the paper from buckling or warping when wet. |
| Brushes | Select a variety of brushes in different shapes and sizes to achieve different effects. Round brushes are versatile and commonly used for watercolor animal paintings. Consider investing in a good quality sable or synthetic sable brush for finer details. |
| Palette | A palette is essential for mixing and diluting your watercolor paints. You can choose a traditional palette with wells or opt for a folding palette that is easy to transport. |
| Water container | Use a container to hold water for rinsing your brushes and diluting your paints. It’s recommended to have two containers, one for clean water and one for dirty water. |
| Masking tape | Masking tape is useful for securing your paper to a board or easel and creating clean edges on your painting. |
| Pencil and eraser | Use a pencil to sketch your initial drawing on the watercolor paper. Make sure to use a light hand to avoid leaving visible lines. An eraser will come in handy for correcting mistakes. |
| Masking fluid | Masking fluid is a liquid latex compound used to protect specific areas of your painting from being painted over. It can be applied with a brush or a ruling pen. |
| Paper towels or a cloth | Keep some paper towels or a cloth nearby for blotting excess water or paint from your brushes. |
Having these essential supplies at hand will ensure that you have everything you need to begin your watercolor animal painting journey.
UNDERSTANDING THE TECHNIQUE
UES OF WATERCOLOR ANIMAL PAINTINGS
Watercolor animal paintings involve specific techniques that allow artists to achieve stunning results. Here are some fundamental techniques to familiarize yourself with:
WET-ON-WET TECHNIQUE
The wet-on-wet technique involves applying wet paint onto a wet surface. This technique allows colors to blend and bleed together, creating soft transitions and organic shapes. It is particularly useful for capturing the fluidity and spontaneity of animal fur, feathers, or scales.
To use the wet-on-wet technique, wet your watercolor paper with clean water using a large brush. Then, while the paper is still wet, apply diluted paint to create the desired effect. Experiment with different color combinations and observe how they interact on the wet surface.
DRY BRUSH TECHNIQUE
The dry brush technique involves using a relatively dry brush with minimal water and paint to create texture and fine details. This technique is useful for capturing the intricate textures of animal fur, feathers, or skin.
To use the dry brush technique, dip your brush lightly into the paint and remove excess moisture by dabbing it on a paper towel. Apply the brush with gentle pressure, allowing the texture of the paper to show through. This technique creates a scratchy, textured effect that adds depth and realism to your animal paintings.
LAYERING AND GLAZING
Layering and glazing techniques involve building up multiple transparent layers of paint to achieve depth, volume, and richness in your watercolor animal paintings. Layering involves allowing each layer to dry before applying the next, while glazing involves applying thin, transparent layers over dry paint.
By layering and glazing, you can gradually build up the colors, values, and details in your animal paintings. This technique is especially effective when depicting the various tones and textures found in animal fur, feathers, or scales.
LIFTING AND MASKING
Lifting and masking techniques are helpful for correcting mistakes or preserving specific areas of your painting. Lifting involves removing wet or dry paint from the surface using a clean brush, sponge, or paper towel. Masking involves using masking fluid or tape to protect certain areas from being painted over.
These techniques give you the flexibility to make adjustments and create highlights or intricate patterns in your animal paintings. However, it’s important to use them sparingly and with caution to maintain the integrity of your artwork.
CHOOSING REFERENCE PHOTOS FOR WATERCOLOR ANIMAL PAINTINGS
Selecting the right reference photo is crucial for creating a successful watercolor animal painting. A well-chosen reference photo serves as a guide and inspiration for capturing the essence and character of the animal you wish to paint.
When choosing a reference photo, consider the following factors:
- Clarity and Detail: Look for high-resolution photos that provide clear and detailed information about the animal’s features, textures, and colors. This will help you accurately depict the subject in your painting.
- Composition: Consider the composition of the photo and how it will translate into a visually appealing painting. Look for interesting angles, dynamic poses, or unique perspectives that will make your painting more captivating.
- Lighting and Shadows: Pay attention to the lighting conditions in the reference photo. Strong light and shadow play can add depth and drama to your watercolor animal painting.
- Expression and Personality: Choose a reference photo that captures the animal’s personality and unique traits. This will allow you to infuse your painting with character and emotion.
Remember that reference photos serve as a guide but should not be copied directly. Use them as a reference for proportions, colors, and details, but add your artistic interpretation and style to make the painting your own.
In the next blog post, we will explore the process of creating realistic watercolor animal paintings by understanding animal anatomy, color theory, and capturing textures and fur in watercolor.
 CategoriesDazzling Art Boutique Blog
The Ultimate Guide to Watercolor Clipart
SECTION 1: INTRODUCTION TO WATERCOLOR CLIPART
Watercolor clipart has gained immense popularity in recent years, becoming a favorite among designers, artists, and hobbyists. This unique form of digital art combines the beauty and fluidity of watercolor painting with the convenience and versatility of digital graphics. In this section, we will explore what watercolor clipart is, why it has become so popular, how it is created, and its common uses.

1.1 WHAT IS WATERCOLOR CLIPART?
Watercolor clipart refers to digital images or graphics created using watercolor painting techniques. It captures the essence of traditional watercolor art, showcasing the delicate textures, vibrant colors, and organic brushstrokes characteristic of this medium. These clipart images are typically saved in a format that allows them to be easily incorporated into various design projects, such as illustrations, invitations, cards, posters, and more.
Unlike traditional watercolor paintings that are created on physical paper using brushes and pigments, watercolor clipart is created digitally using specialized software and tools. This allows artists to experiment, refine, and modify their artwork with ease, while preserving the unique qualities of watercolor painting.
1.2 WHY IS WATERCOLOR CLIPART POPULAR?
Watercolor clipart has gained immense popularity due to its aesthetic appeal and versatility. Here are some reasons why it has become a favorite choice for designers and artists:
1.2.1 ORGANIC AND HAND-CRAFTED LOOK
Watercolor clipart offers a natural and organic look that adds a touch of authenticity and charm to any design. The subtle variations in color and texture, along with the imperfect brushstrokes, give the artwork a hand-crafted feel that is visually appealing and captivating.
1.2.2 VERSATILITY AND ADAPTABILITY
Watercolor clipart can be used in a wide range of design projects, making it incredibly versatile. Whether you are designing wedding invitations, branding materials, or social media graphics, watercolor clipart can add a unique and artistic touch to your creations.
1.2.3 TRENDY AND TIMELESS
Watercolor art has a timeless quality that never goes out of style. It has a certain elegance and sophistication that appeals to a wide audience. By incorporating watercolor clipart into your designs, you can stay on-trend and create visually stunning artwork that stands the test of time.
1.3 HOW IS WATERCOLOR CLIPART CREATED?
Creating watercolor clipart requires a combination of traditional painting techniques and digital tools. Here is a step-by-step overview of the process:
- Gathering Inspiration: Artists often start by gathering inspiration from various sources, such as nature, photographs, or other artwork. This helps them envision the subject and composition of their clipart.
- Sketching: The next step involves sketching the design on paper or digitally. This helps in refining the composition and getting a sense of how the final artwork will look.
- Watercolor Painting: Using watercolor paints and brushes, artists paint the desired elements of their clipart. They carefully layer the colors, create gradients, and add texture to achieve the desired effect.
- Scanning or Photographing: Once the watercolor painting is complete, it is either scanned or photographed using high-quality equipment to capture the details and colors accurately.
- Digitization: The scanned or photographed artwork is then imported into digital software, such as Adobe Photoshop or Illustrator. Artists use these tools to clean up the image, adjust colors, and remove any imperfections.
- Vectorization (Optional): In some cases, artists may choose to convert their watercolor artwork into vector format. This allows for better scalability and flexibility in resizing the clipart without losing quality.
- Saving and Exporting: Finally, the watercolor clipart is saved in a format that supports transparency, such as PNG or TIFF. This ensures that the clipart can be easily layered and incorporated into various design projects.
1.4 COMMON USES OF WATERCOLOR CLIPART
Watercolor clipart finds its application in a wide range of creative projects. Some common uses include:
- Invitations and Stationery: Watercolor clipart is often used to design beautiful and personalized wedding invitations, greeting cards, thank-you notes, and other stationery items.
- Art Prints and Posters: Artists and art enthusiasts create stunning prints and posters using watercolor clipart, which can be framed and displayed as standalone artwork or as part of a gallery wall.
- Digital Scrapbooking: Watercolor clipart adds a whimsical and artistic touch to digital scrapbook layouts, helping to create visually appealing memory keepsakes.
- Web Design and Social Media Graphics: Web designers and social media managers incorporate watercolor clipart into website designs, blog graphics, social media posts, and marketing materials to enhance visual appeal and engage viewers.
- Packaging and Branding: Watercolor clipart is often used in packaging design, labels, and branding materials to create a unique and memorable brand identity.
In the next section, we will explore the different types of watercolor clipart available and how they can be used in your projects.

SECTION 2: TYPES OF WATERCOLOR CLIPART
Watercolor clipart comes in various forms and styles, each offering its own unique characteristics and creative possibilities. In this section, we will explore the different types of watercolor clipart available, including hand-painted watercolor clipart, digital watercolor clipart, watercolor clipart with transparent backgrounds, and watercolor clipart sets.
2.1 HAND-PAINTED WATERCOLOR CLIPART
Hand-painted watercolor clipart refers to artwork that is created using traditional watercolor techniques. Each element of the clipart is individually painted by hand, capturing the nuances and textures that make watercolor art so captivating. This type of clipart offers a truly authentic and organic look, with variations in color, brushstrokes, and transparency.
Hand-painted watercolor clipart is highly sought after by artists and designers who value the uniqueness and craftsmanship of traditional painting. It allows for more artistic freedom and customization, as each brushstroke and color choice is carefully crafted by the artist. This type of clipart is often used in projects that require a personal and artistic touch, such as wedding invitations, art prints, and handmade crafts.
2.2 DIGITAL WATERCOLOR CLIPART
Digital watercolor clipart is created using digital tools and software, mimicking the look and feel of traditional watercolor painting. Artists use specialized brushes and techniques to replicate the textures and effects of watercolor on a digital canvas. This type of clipart offers the convenience and flexibility of digital art, allowing for easy editing, resizing, and customization.
Digital watercolor clipart provides a wide range of possibilities for artists and designers. It allows for precise control over colors, layers, and effects, making it easier to create complex compositions and designs. This type of clipart is often used in digital illustrations, graphic design projects, and digital scrapbooking, where the ability to edit and manipulate the artwork is essential.
2.3 WATERCOLOR CLIPART WITH TRANSPARENT BACKGROUND
Watercolor clipart with transparent backgrounds is designed to seamlessly blend into any project. With the background removed, these clipart elements can be easily layered on top of other images or backgrounds without any visible edges or boundaries. This makes them highly versatile and adaptable, allowing for endless creative possibilities.
Having a transparent background enables designers to create visually stunning compositions by combining multiple clipart elements and textures. It also makes it effortless to incorporate watercolor clipart into various design projects, such as invitations, posters, and digital collages. The transparency adds depth and dimension to the artwork, creating a more realistic and immersive visual experience.
2.4 WATERCOLOR CLIPART SETS
Watercolor clipart sets are curated collections of related clipart elements, often based on a theme or subject. These sets include a variety of individual clipart elements, such as flowers, animals, objects, and patterns, allowing users to mix and match to create their own unique compositions. They are a convenient option for designers who want a cohesive and coordinated look in their projects.
Watercolor clipart sets provide a wide range of design possibilities, as they typically include a diverse selection of elements that can be combined to create stunning visuals. Whether you’re designing a wedding invitation, creating a brand identity, or decorating a nursery, watercolor clipart sets offer a convenient solution for adding a touch of artistry and elegance to your designs.
In the next section, we will explore how to find and download watercolor clipart, including online marketplaces, free and paid resources, licensing considerations, and tips for choosing high-quality clipart.

SECTION 3: HOW TO FIND AND DOWNLOAD WATERCOLOR CLIPART
Finding and downloading watercolor clipart is an essential step for artists, designers, and anyone looking to incorporate this beautiful medium into their creative projects. In this section, we will explore various methods and resources for finding high-quality watercolor clipart, including online marketplaces, free and paid resources, licensing considerations, and tips for choosing the best clipart for your needs.
3.1 ONLINE MARKETPLACES FOR WATERCOLOR CLIPART
Online marketplaces are a treasure trove of watercolor clipart, offering a vast selection of high-quality options from talented artists and designers. Here are some popular online marketplaces where you can find and purchase watercolor clipart:
| Marketplace | Description |
|---|---|
| Etsy | Etsy is known for its wide range of handcrafted and unique products, including watercolor clipart. You can find a diverse selection of clipart sets and individual elements created by independent artists. |
| Creative Market | Creative Market is a popular platform for buying and selling design assets, including watercolor clipart. It offers a vast collection of clipart sets, fonts, templates, and more from various artists and designers. |
| Design Bundles | Design Bundles provides affordable design resources, including watercolor clipart, illustrations, and fonts. They offer regular bundles and deals, making it a cost-effective option for purchasing clipart. |
| The Hungry JPEG | The Hungry JPEG offers a wide range of design resources, including watercolor clipart, fonts, and mockups. They also provide a weekly freebies section where you can download free clipart and other design assets. |
These marketplaces often allow you to search for clipart based on themes, keywords, or specific categories, making it easier to find exactly what you’re looking for. They also provide previews and detailed descriptions of the clipart, allowing you to assess the quality and suitability for your project.
3.2 FREE AND PAID WATERCOLOR CLIPART RESOURCES
In addition to online marketplaces, there are numerous websites and platforms that offer both free and paid watercolor clipart resources. Here are some popular options:
3.2.1 FREE WATERCOLOR CLIPART RESOURCES
| Website | Description |
|---|---|
| Freepik | Freepik offers a vast collection of free watercolor clipart, illustrations, and graphic resources. They have a dedicated section for watercolor-themed graphics, making it easy to find what you need. |
| Pixabay | Pixabay is a popular platform for free stock photos and illustrations. They also have a selection of free watercolor clipart that you can use for personal and commercial projects. |
| Unsplash | Unsplash is well-known for its high-quality free stock photos, but they also have a small collection of free watercolor clipart and illustrations. |
While free watercolor clipart resources are a great starting point, it’s important to review the licensing terms and restrictions for each resource. Some may require attribution or have limitations on commercial use, so be sure to read the terms of use before incorporating the clipart into your projects.
3.2.2 PAID WATERCOLOR CLIPART RESOURCES
| Website | Description |
|---|---|
| Design Cuts | Design Cuts offers premium design resources, including watercolor clipart, brushes, and textures. They curate high-quality collections from top designers, ensuring exceptional quality and variety. |
| The Ink Nest | The Ink Nest specializes in hand-painted watercolor clipart and offers a range of premium clipart sets and individual elements. Their clipart is meticulously crafted and perfect for creating stunning designs. |
| Creative Fabrica | Creative Fabrica provides a wide range of design assets, including watercolor clipart, fonts, and craft templates. They offer a subscription model that provides access to a growing library of resources. |
Paid resources often offer more extensive collections, higher quality, and additional perks such as customer support and commercial licenses. They are a great investment for professional designers or those who frequently require premium clipart for their projects.
3.3 LICENSING AND USAGE RIGHTS OF WATERCOLOR CLIPART
Understanding licensing and usage rights is crucial when using watercolor clipart, as it ensures legal and ethical use of the artwork. Here are some common licensing terms you may encounter:
- Personal Use: Clipart with personal use licenses can be used for non-commercial purposes, such as personal crafts, artwork, or gifts.
- Commercial Use: Clipart with commercial use licenses allows you to incorporate the artwork into products or designs intended for sale or promotional purposes.
- Royalty-Free: Royalty-free licenses typically allow unlimited use of the clipart without the need for additional fees or royalties. However, specific terms may still apply, so it’s important to review the license agreement.
- Attribution: Some clipart resources may require attribution, where you need to credit the artist or the source of the clipart in your project.
Always review the licensing terms provided by the artist or the platform to ensure that your intended use aligns with the license type and any specific restrictions or requirements.
3.4 TIPS FOR CHOOSING HIGH-QUALITY WATERCOLOR CLIPART
With a plethora of watercolor clipart options available, choosing the right ones for your project can be overwhelming. Here are some tips to help you select high-quality clipart:
- Preview Images: Look for platforms or resources that provide detailed previews of the clipart, showcasing the quality and details of the artwork.
- Resolution and Size: Consider the resolution and size of the clipart files. Higher resolutions ensure sharp and crisp graphics, while larger sizes provide more flexibility in resizing and usage.
- Variety and Versatility: Opt for clipart sets or resources that offer a diverse range of elements, allowing you to create various compositions and designs.
- Compatibility: Ensure that the clipart files are compatible with the software you use for your projects. Most clipart resources provide files in common formats like PNG or JPEG, which are widely supported.
- Reviews and Recommendations: Check for reviews or recommendations from other users to get insights into the quality and usability of the clipart.
By considering these factors, you can choose watercolor clipart that meets your specific requirements and helps you create visually stunning designs.
In the next section, we will delve into tips and techniques for effectively using watercolor clipart in your design projects, including incorporating clipart in graphic design, creating custom designs, enhancing photos, and printing and framing artwork.

SECTION 4: TIPS AND TECHNIQUES FOR USING WATERCOLOR CLIPART
Watercolor clipart provides a versatile and creative way to enhance your design projects. In this section, we will explore various tips and techniques for effectively using watercolor clipart in your designs. We’ll cover incorporating clipart in graphic design, creating custom designs, enhancing photos, and printing and framing artwork.
4.1 INCORPORATING WATERCOLOR CLIPART IN GRAPHIC DESIGN
Watercolor clipart can add a touch of artistry and elegance to your graphic design projects. Here are some tips to help you incorporate watercolor clipart effectively:
- Composition: Consider the composition of your design and how the clipart elements can be strategically placed to enhance the overall visual impact. Experiment with different arrangements and layering techniques to create depth and dimension.
- Color Palette: Pay attention to the color palette of your design and ensure that the clipart elements harmonize with the overall color scheme. You can adjust the colors of the clipart using graphic editing software to match the desired palette.
- Blend Modes: Experiment with different blend modes in your design software to blend the clipart seamlessly with the background or other elements. This can create interesting effects and enhance the integration of the clipart into your design.
- Texturing: Apply textures or overlays to the clipart and other design elements to add depth and texture to your composition. This can create a more realistic and tactile feel, resembling traditional watercolor art.
- Layering and Masking: Utilize layers and masking techniques to combine multiple clipart elements and create complex compositions. This allows for greater flexibility and customization in your design.
4.2 CREATING CUSTOM DESIGNS WITH WATERCOLOR CLIPART
Watercolor clipart provides endless possibilities for creating custom designs. Here are some techniques to unleash your creativity:
- Mix and Match: Combine different clipart elements to create unique arrangements and compositions. Experiment with layering, resizing, and rotating to achieve the desired effect.
- Customize Colors: Use graphic editing software to adjust the colors of the clipart to match your design requirements. This allows for more customization and ensures that the clipart seamlessly integrates with your overall design.
- Create Patterns: Transform individual clipart elements into seamless patterns that can be used as backgrounds or to fill shapes. This adds visual interest and can be a great way to incorporate watercolor textures into your designs.
- Add Typography: Combine watercolor clipart with typography to create eye-catching designs. Experiment with different fonts, sizes, and placements to achieve the desired visual balance.
- Create Branding Elements: Use watercolor clipart to create unique branding elements, such as logos, icons, or patterns, that reflect the style and personality of your brand. This can help create a cohesive and memorable brand identity.
4.3 ENHANCING PHOTOS WITH WATERCOLOR CLIPART
Watercolor clipart can be used to enhance and transform photographs, giving them an artistic and whimsical touch. Here are some techniques for incorporating watercolor clipart into your photos:
- Overlay Effects: Overlay watercolor clipart elements onto your photos using graphic editing software. Adjust the opacity and blend modes to achieve the desired effect. This can add texture and visual interest to your photos.
- Selective Coloring: Apply watercolor clipart elements to specific areas of your photos, such as flowers, objects, or backgrounds, to add vibrant pops of color. This can create a focal point and enhance the overall composition.
- Collages and Montages: Create collages or montages by combining multiple photos with watercolor clipart elements. This can result in visually striking compositions that tell a unique story.
- Frame Designs: Use watercolor clipart to design frames or borders around your photos. This can add a decorative element and draw attention to the main subject of your photo.
4.4 PRINTING AND FRAMING WATERCOLOR CLIPART ARTWORK
If you plan to print and frame your watercolor clipart artwork, here are some tips to ensure the best results:
- Resolution and Size: Ensure that the clipart files you use for printing are of high resolution to maintain sharpness and clarity. Consider the size of the final printed artwork and choose a resolution that matches the desired print quality.
- Paper Selection: Choose a high-quality paper that complements the watercolor aesthetic. Textured or watercolor paper can enhance the overall appearance and feel of the artwork.
- Printing Techniques: Consider using professional printing services that specialize in art prints to ensure accurate color reproduction and optimal print quality. Discuss options such as giclée printing, which offers excellent color accuracy and longevity.
- Matting and Framing: Select matting and framing options that complement the style and colors of your watercolor clipart artwork. Consider using archival materials to protect and preserve the artwork for years to come.
By considering these tips and techniques, you can create visually stunning designs, customize clipart to fit your project’s requirements, enhance your photos with artistic touches, and present your watercolor clipart artwork in the best possible way.
In the next section, we will conclude our guide to watercolor clipart by recapping its benefits and offering final thoughts and inspiration.
SECTION 5: CONCLUSION
Watercolor clipart offers a unique and artistic way to enhance your design projects. In this guide, we have explored the world of watercolor clipart, starting with an introduction to its definition, popularity, creation process, and common uses. We then delved into the different types of watercolor clipart, including hand-painted clipart, digital clipart, clipart with transparent backgrounds, and clipart sets.
We discussed various methods for finding and downloading watercolor clipart, such as online marketplaces, free and paid resources, and highlighted the importance of understanding licensing and usage rights. Additionally, we provided tips and techniques for effectively using watercolor clipart in graphic design, creating custom designs, enhancing photos, and printing and framing artwork.
Watercolor clipart has become popular due to its organic and handcrafted look, versatility, and timeless appeal. It adds a touch of elegance and creativity to various design projects, allowing you to create visually stunning compositions. Whether you are a professional designer, artist, or hobbyist, watercolor clipart offers endless possibilities for expressing your creativity and adding a unique artistic flair to your work.
As you explore the world of watercolor clipart, remember to consider factors such as composition, color palette, and blend modes to effectively incorporate clipart into your designs. Experiment with mixing and matching clipart elements, customizing colors, and creating patterns to create unique and personalized artwork.
When using watercolor clipart to enhance photographs, consider overlaying elements, applying selective coloring, or creating collages and montages to transform your photos into artistic masterpieces. And if you plan to print and frame your watercolor clipart artwork, pay attention to resolution, paper selection, and printing techniques to ensure the best results.
In conclusion, watercolor clipart is a versatile and creative tool that allows you to add a touch of artistry and elegance to your design projects. By exploring different types of clipart, utilizing various techniques, and unleashing your creativity, you can create visually stunning artwork that captivates and delights viewers.
We hope this ultimate guide to watercolor clipart has provided you with valuable insights, tips, and inspiration to embark on your creative journey. Embrace the beauty of watercolor clipart and let your imagination soar to new artistic heights. Happy designing!

 CategoriesDazzling Art Boutique Blog
Creative Market vs. Creative Fabrica: A Comparative Analysis of Creative Marketplaces
In today’s digital age, creative professionals and hobbyists alike are constantly seeking high-quality resources to bring their artistic visions to life. Creative marketplaces have emerged as valuable platforms where designers can find and sell a wide range of creative assets, from fonts and illustrations to templates and digital products.
Comparison Chart for Creative Market vs Creative Fabrica:
| Feature | Creative Market | Creative Fabrica |
|---|---|---|
| Marketplace Concept | Offers diverse range of digital assets by independent creators | Focuses on fonts, graphics, and craft resources |
| Product Quality | Strict quality standards with a broad selection of assets | Curated collection with an emphasis on fonts and exclusive bundles |
| Pricing Models | Individual purchase model | Subscription-based model |
| Licensing and Usage | Standard and extended licenses available | Standard license, commercial use rights included for subscribers |
| Community and Support | Vibrant community, forums, and customer support | Facebook group, responsive email and chat support |
Please note that this table provides a simplified overview of the main points of comparison. For more detailed information, please refer to the earlier sections of the blog post.

Both Creative Market and Creative Fabrica are reputable creative marketplaces that cater to the needs of designers and creative professionals. Choosing between the two depends on your specific requirements and preferences. Creative Market offers a wide range of creative assets, allowing for individual purchases, while Creative Fabrica stands out for its subscription-based model and extensive font collection. Consider factors such as pricing models, product variety, licensing terms, and community support to make an informed decision that best aligns with your creative aspirations. Whichever marketplace you choose, both platforms provide valuable resources to fuel your creativity and bring your design projects to life.

 CategoriesDazzling Art Boutique Blog
The Thylacine: A Fascinating Tale of Extinction and Conservation
Welcome,
to this exclusive article dedicated to the Thylacine, a remarkable creature that once roamed the wild landscapes of Tasmania.
Accompanying my Watercolor Illustration set of the Thylacine, please join me on a journey to discover the history and tragic extinction of this unique marsupial. Let’s delve into the captivating story of the Thylacine and explore the ongoing efforts to preserve its legacy.

-
The Enigmatic Thylacine:
The Thylacine, also known as the Tasmanian Tiger or Tasmanian Wolf, was a carnivorous marsupial with a distinctive appearance. Its tiger-like stripes and dog-like characteristics made it a truly mesmerizing creature. Through an in-depth exploration, we will unveil the Thylacine’s physical features, behavior, and habitat preferences.
-
A Tale of Survival:
The Thylacine’s journey of survival is a captivating tale that spans centuries. As we trace its origins and evolution, we discover a species uniquely adapted to its environment. The Thylacine’s ancestors navigated the changing landscapes of Australia, eventually finding their way to the isolated island of Tasmania. With its dog-like body and kangaroo-like pouch, the Thylacine exemplified the incredible diversity of marsupials. Its sharp teeth, powerful jaws, and exceptional leaping ability made it a formidable predator in the Tasmanian wilderness. Despite facing competition from other carnivores, the Thylacine carved out its ecological niche and thrived in harmony with its surroundings.The Thylacine’s survival strategies extended beyond physical adaptations. Through its elusive and solitary nature, it became a master of camouflage and stealth. Its striped fur pattern allowed it to blend seamlessly into the dense undergrowth, enabling it to stalk prey unnoticed. The Thylacine’s ability to remain undetected in its natural habitat exemplified its remarkable survival instincts. It is awe-inspiring to imagine the Thylacine’s nightly prowls through the Tasmanian wilderness, as it navigated the challenges of finding food, avoiding danger, and perpetuating its species. The Thylacine’s tale of survival serves as a testament to the resilience and ingenuity of Earth’s diverse creatures.
-
The Tragic Decline:
The Thylacine’s story takes a sorrowful turn as we delve into the factors that led to its tragic decline and eventual extinction. Human interference played a significant role in the demise of this iconic marsupial. With European settlement in Tasmania, the Thylacine’s habitat faced rapid transformation. Deforestation, coupled with the introduction of domesticated animals, disrupted the delicate balance of the ecosystem, depriving the Thylacine of its natural prey and territorial range. The Thylacine also became a target of human persecution, with government-sanctioned bounty hunting aiming to eradicate the species due to misconceptions about its threat to livestock. The combination of habitat loss, hunting pressures, and diseases introduced by European settlers pushed the Thylacine to the brink of extinction. Tragically, the last known Thylacine passed away in captivity in 1936, marking the end of a species that had once roamed the Tasmanian wilderness with grace and power. The decline and loss of the Thylacine stands as a haunting reminder of the impact human activities can have on fragile ecosystems and the urgent need for conservation efforts to protect our planet’s irreplaceable biodiversity.
-
Remembering the Thylacine:
The Thylacine holds a special place in the hearts and minds of people around the world, its image forever etched into the cultural tapestry. For indigenous communities in Tasmania, the Thylacine carries deep spiritual and cultural significance. Ancient rock art depicting this enigmatic creature serves as a testament to its enduring presence in their folklore and legends. The Thylacine’s role as a powerful totemic symbol reflects its importance in indigenous cosmology, representing resilience, adaptability, and the delicate balance of nature.Beyond indigenous cultures, the Thylacine has captured the imagination of people worldwide. From its first scientific description in the early 19th century to its subsequent popularity in zoos and circuses, the Thylacine became an icon of fascination. Its unique appearance, with its tiger-like stripes and dog-like features, made it instantly recognizable and admired by artists, writers, and naturalists alike.
Today, the Thylacine’s iconic status extends beyond its physical existence. It has become a potent symbol of conservation and the consequences of human actions on biodiversity. The Thylacine’s story serves as a cautionary tale, reminding us of the irreversible loss that can result from habitat destruction, unchecked hunting, and a lack of environmental stewardship. Its image graces artwork, literature, and campaigns advocating for the preservation of endangered species and the need to protect the delicate balance of ecosystems.
Remembering the Thylacine is a way of honoring its memory and recognizing the broader implications of its extinction. It reminds us of our responsibility to conserve and protect the natural world, ensuring that no more creatures face the same tragic fate. The Thylacine’s cultural significance and iconic status serve as powerful reminders of the intricate interconnections between humans and the environment, urging us to strive for a future where biodiversity thrives and the wonder of species like the Thylacine continues to inspire generations to come.
-
Conservation Efforts:
Despite the Thylacine’s tragic extinction, dedicated individuals and organizations are working tirelessly to revive hope for this remarkable species. Scientific advancements in genetic research and cloning technologies have opened up possibilities for potential resurrection, aiming to bring the Thylacine back from the pages of history. While the ethical and practical implications of de-extinction are subject to ongoing debate, these discussions have sparked renewed interest in the Thylacine’s conservation. Additionally, conservation organizations are actively involved in preserving the Thylacine’s legacy through education, habitat restoration, and advocacy for the protection of endangered species. Breeding programs, genetic studies, and public awareness campaigns all play vital roles in honoring the memory of the Thylacine and inspiring a collective commitment to safeguarding the planet’s unique biodiversity. As these efforts continue, they offer a glimmer of hope for the Thylacine’s potential return and serve as a poignant reminder of humanity’s responsibility to protect and preserve our planet’s most vulnerable creatures.
. -
Preserving the Legacy:
The story of the Thylacine’s extinction serves as a poignant reminder of the critical importance of wildlife conservation. It highlights the urgent need to protect and preserve Earth’s diverse and endangered species, ensuring their survival for future generations. The Thylacine’s loss is a sobering example of the irreversible consequences of human activities, including habitat destruction, hunting, and a lack of environmental stewardship.By cherishing the memory of the Thylacine and promoting its conservation, we honor not only a unique species but also the intrinsic value of all living creatures. Every species, no matter how small or seemingly insignificant, plays a vital role in maintaining the delicate balance of ecosystems. The Thylacine’s disappearance is a stark reminder that the loss of one species can have far-reaching consequences, disrupting the intricate web of life and causing ripple effects throughout the natural world.
Wildlife conservation encompasses more than protecting individual species. It involves safeguarding habitats, preserving biodiversity, and addressing the root causes of environmental degradation. Through concerted efforts, we can mitigate the factors that threaten the existence of countless species, including habitat loss, pollution, climate change, and illegal wildlife trade.
Conservation initiatives also hold economic, social, and cultural significance. Protected areas and wildlife sanctuaries not only preserve biodiversity but also serve as sources of research, education, and ecotourism. They contribute to local economies, provide livelihood opportunities for communities, and promote cultural heritage tied to the natural world.
Furthermore, by valuing and protecting wildlife, we nurture a sense of wonder and respect for nature. Conservation efforts inspire future generations to become stewards of the environment, fostering a deep connection with the natural world and instilling a responsibility to protect it.
Each one of us can contribute to wildlife conservation in meaningful ways. By supporting conservation organizations, advocating for sustainable practices, reducing our ecological footprint, and spreading awareness about the importance of biodiversity, we can collectively make a positive impact. It is our shared responsibility to protect the legacy of the Thylacine and all endangered species, ensuring a future where the wonders of the natural world continue to thrive.
In conclusion, the Thylacine’s extinction stands as a stark reminder of the urgent need for wildlife conservation. By preserving the legacy of this remarkable species, we reaffirm our commitment to protecting Earth’s biodiversity, maintaining ecological balance, and nurturing a deep reverence for all living creatures. Let us cherish the memory of the Thylacine and join hands in safeguarding the remarkable tapestry of life on our planet.

PS: With the Thylacine watercolor illustration clipart set, the creative possibilities are endless. You can unlock a world of artistic expression and bring the allure of this extinct marsupial to life in your projects. Whether you are a graphic designer, illustrator, or a hobbyist looking to add a touch of unique charm, this clipart set offers a wealth of opportunities.
Create captivating digital artwork, design eye-catching posters, greeting cards, or invitations, or adorn your website or social media platforms with the Thylacine’s graceful presence.
The high-quality watercolor illustrations allow you to infuse your creations with the Thylacine’s distinct stripes and captivating features, invoking a sense of nostalgia and wonder. Let your imagination soar as you explore the myriad ways to incorporate the Thylacine clipart set into your artistic endeavors, allowing this extraordinary creature to live on through your art.
 CategoriesDazzling Art Boutique Blog
Inspiring Change: Promoting Sustainability and Climate Change Awareness
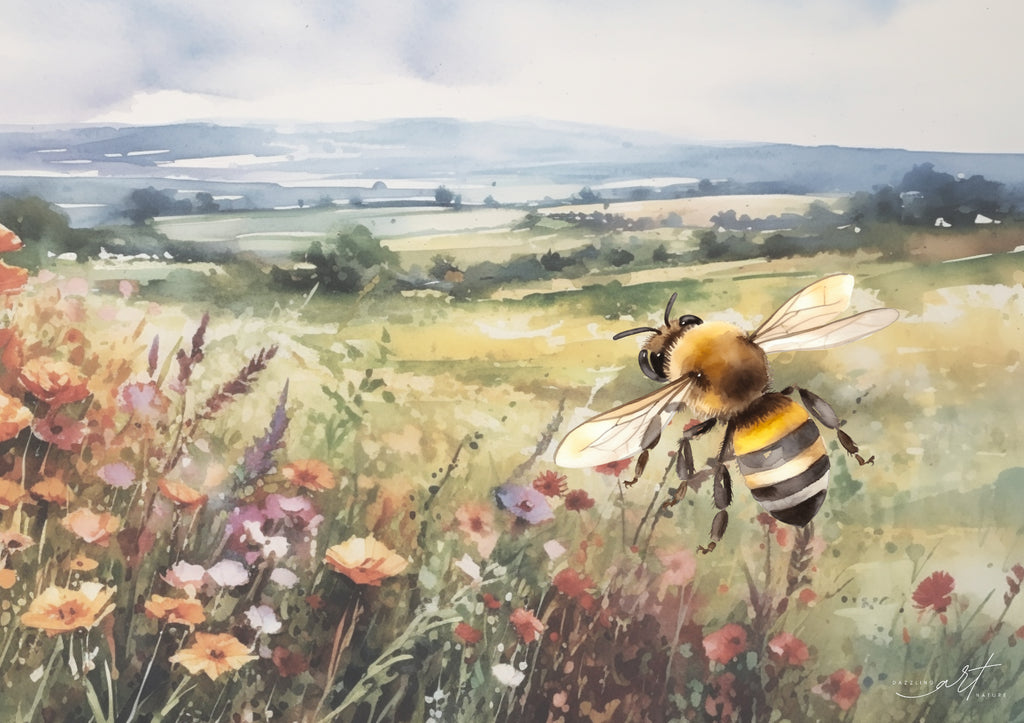
Nature has the power to captivate our hearts and inspire positive change. In the face of climate change, it is more important than ever to raise awareness and promote sustainability. One creative avenue to achieve this is through nature-themed watercolor clipart. These beautiful and evocative illustrations can serve as a catalyst for sparking conversations, encouraging action, and promoting a greener future.


Nature-themed watercolor clipart holds immense potential in promoting sustainability and raising awareness for climate change. Through visual connections, fostering empathy, educating and informing, inspiring sustainable choices, and sparking conversations, we can harness the power of art to create a positive impact. By integrating these illustrations into various mediums and platforms, we have the opportunity to reach a wide audience, engage their emotions, and inspire meaningful action. Let us embrace the beauty of nature and the transformative power of art to drive change and promote a sustainable future for generations to come.

 CategoriesDazzling Art Boutique Blog
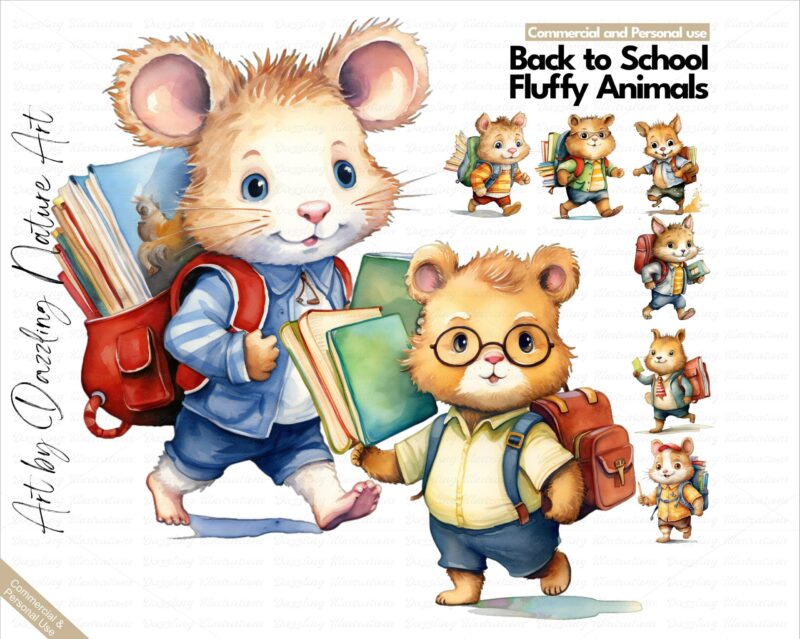
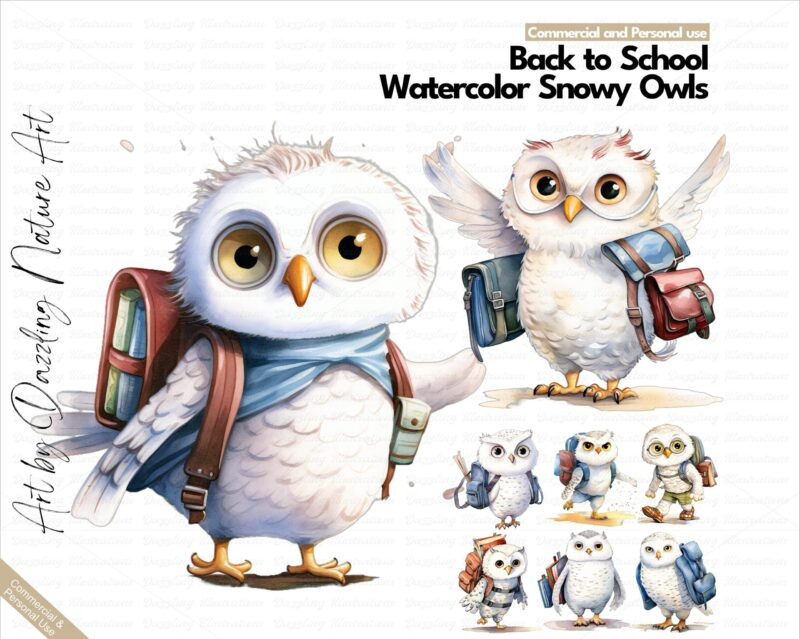
Embrace the Beauty of Nature: Infusing Your Etsy Store with Watercolor Animals and Bird Clipart Sets
Bringing nature’s captivating charm into your Etsy store can enchant customers who appreciate the wonders of the natural world. One delightful way to achieve this is by utilizing watercolor animals and bird clipart sets. These artistic illustrations allow you to infuse your products and marketing materials with the essence of nature, creating a visually captivating experience for your customers.

